Here is a step by step guide that gives a solution to your query. How to Delete an unwanted or blank Page or Sheet in Microsoft Word.
Due to its excellent features and multiple functionalities. Microsoft Word is today one of the most used editors and word processors worldwide by millions of users.
Within the enormous range of options offered by the program that makes up the Microsoft Office Suite. There are some simple editions that give us the possibility of shaping a text with just a few buttons.
However, one of the problems that often arise when we write a text in Word is the appearance of blank sheets or pages. Which without a doubt is not only too much in the document, but also make it look sloppy.
Of course, there is a method that we can use to delete a sheet in Word. Which we explain in this article. It should be noted that any of the two modes specified here are extremely easy to perform.
Delete a Page in Word STEP BY STEP
Table of Contents
Before going to delete a page in word easily. We must bear in mind that those blank pages that often appear in a Word document. That we have edited, are mainly due to the fact that there are additional paragraphs or page or section breaks within a said page. Leaf.
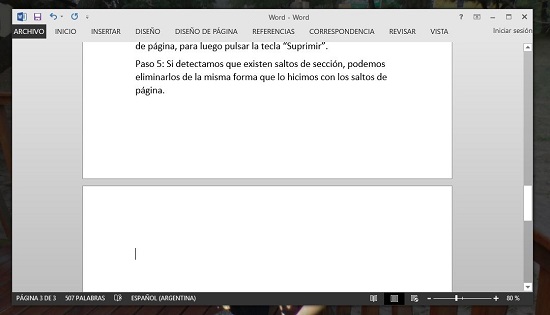
When we find that the sheet in Word that we want to delete it at the end of the document. We can use the simple method to delete it, for which we go to the end of the document. And once there we place the cursor and press the key combination “CTRL + End”. And then press the “Backspace” key.
This should remove the blank Word sheet that appears at the end of the document. However, it may happen that the page is not erased with the mentioned method. Which can happen as a result of that sheet containing additional paragraphs or page breaks? The next option will then be to carry out the procedure detailed below.
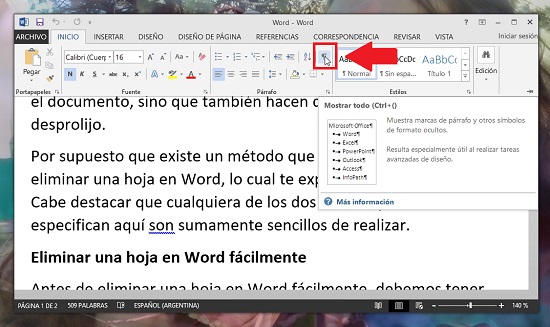
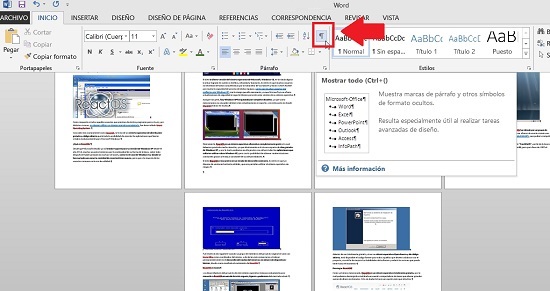
Step 1: The first thing we will do is activate the paragraph marks. For which we must press the key combination “CTRL + SHIFT + 8”. We can also click on the “Show or Hide” button that is located within the “Home” tab in the “Paragraph” section. And has the following form.
Step 2: When the paragraph marks are activated in the document, we can clearly see the reason why blank sheets appear in it.
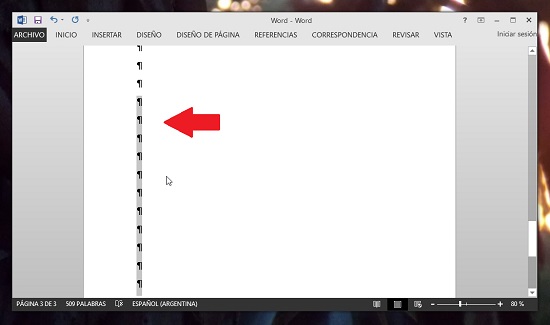
Step 3: In the case that we have detected additional paragraphs at the end of the document, what we will do is select these empty paragraph marks, and then delete them by pressing the “Delete” key.
Phase 4: In the case that we have detected that there are page breaks, we only have to place the cursor before the said page break, and then press the “Delete” key.
Step 5: If we detect that there are section breaks, we can eliminate them in the same way that we did with page breaks.
Delete a Page in Word After a Table
When we work in Word a text that includes some components such as tables. It can also happen to us that we are at the end of editing the document that we find blank pages or sheets. That we do not want to be there.
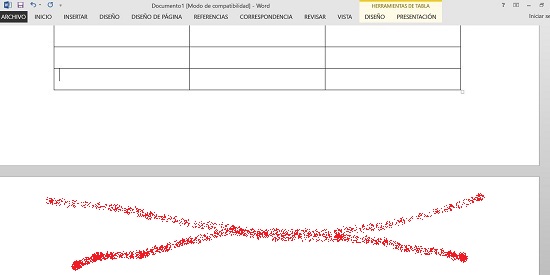
In general, blank sheets in Word documents that include tables usually appear after the presence of one of these tables, when it occupies the entire previous page of the document.
Many users then face the difficulty of eliminating this blank page, which is because we have to take into account that Word needs an empty paragraph after each table, so if a table is occupying an entire page, that is, down to the bottom of the sheet, Word will automatically insert the empty paragraph you need at the end of the table.
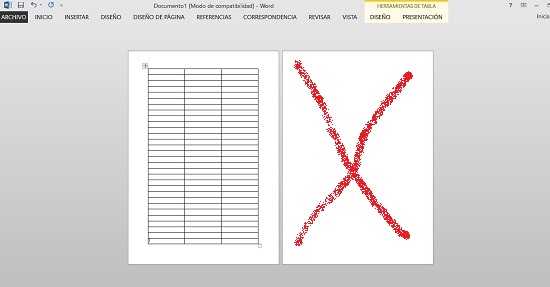
This empty paragraph will then be placed on the next page, so a completely blank sheet will be shown in the document after the created table, and the bad thing is that it will not be possible to eliminate that empty paragraph mark.
Anyway, if we are facing this problem, it is important to keep in mind that we can always solve it, and for this, there is a simple method that we can implement, which basically consists of hiding the empty paragraph at the end of the document.
To perform the procedure we must carry out the following steps.
Step 1
The first thing to do is select the paragraph mark, and then simultaneously press the ” CTRL + M” keys.
Step 2
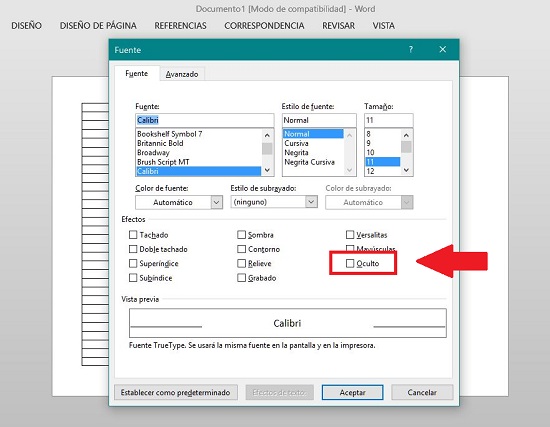
A dialog box called “Font” will be displayed, where we will have to click on the “Hidden” box, with which it will be possible not to delete but to hide that paragraph that causes a blank sheet to be created in our Word document.
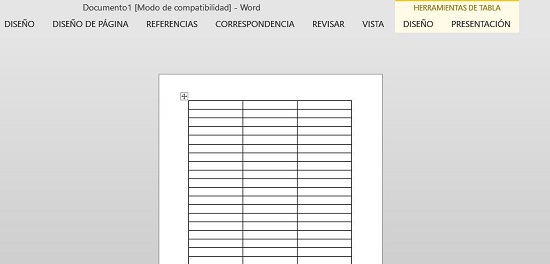
With these steps, the empty paragraph that is created after the table will be hidden, and with this, we would eliminate without additional problems the additional page that we want to disappear from the document.
DELETE A SHEET IN WORD THAT IS IN THE MIDDLE OF THE DOCUMENT
When we work with Word, a number of unwanted blank sheets can be created in a document, which generally has to do with paragraph breaks that we have not eliminated in time or some other factors that can cause these blank pages to appear.
Surely we have been able to verify that these blank sheets cannot be easily removed, which we can verify by placing the cursor on one of them and pressing the delete key, which will show that the pages continue there.
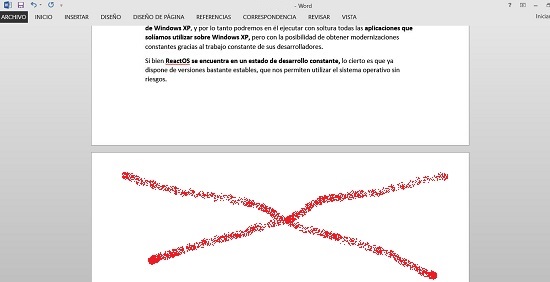
What is the reason why blank sheets in the middle or at the end of the Word document are not erased? Well, the answer is simple, this is because inside these blank sheets there are objects that we cannot see.
In order to delete a blank page in the middle of Word document, it is initially advisable to have a display mode in the application that allows us to check how many blank pages exist in said document, and then start with the method to remove those sheets. Below are the steps to follow to achieve this.
Step 1
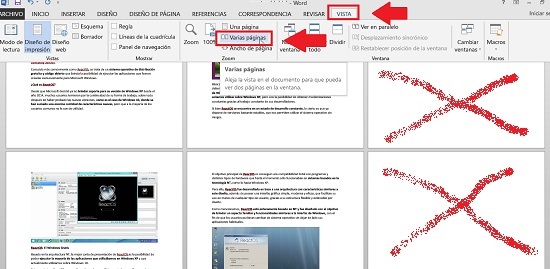
The first thing we will do is go to the “View” tab and once there click the “Multiple pages” option found in the “Zoom” section. This will allow us to have a more panoramic view of the document and in this way, we will be able to detect all the blank sheets in the middle of which we want to remove.
Step 2
Once we have detected the blank sheets, we must carry out a simple procedure that will allow us to view the objects on the blank pages, which we cannot see so far.
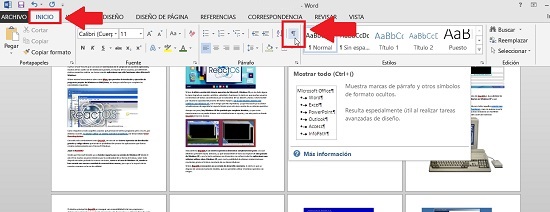
To do this we go to the “Home” tab and there we must activate the option to show or hide “¶”, which is found in the “Paragraph” section.
Step 3
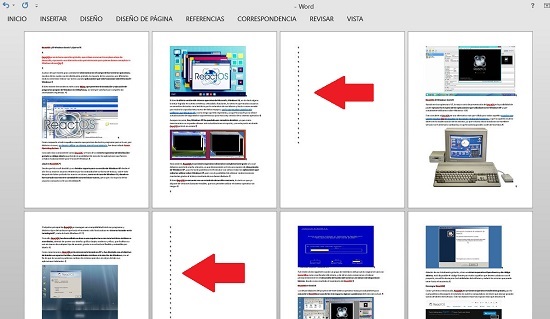
We will see later that when viewing the document, all objects will be shown in the form of dots, which are found occupying these blank sheets in the middle of the document. It is precise because of these objects that we have not yet been able to remove these empty pages.
Step 4
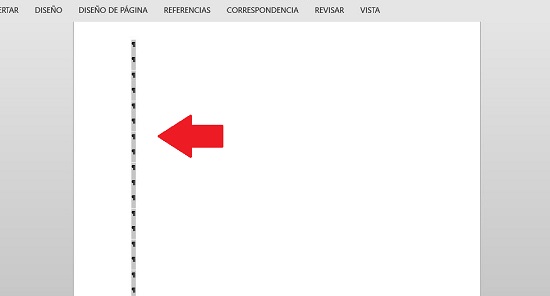
To eliminate the blank sheets, then next will be to select with the cursor, in the same way, that we would do with a text fragment, all the points that you can see in the blank sheets, after which we must press the Backspace key.
Step 5
Finally, we will have to deactivate the option to show or hide “¶”, for which we again go to the “Home” tab and click on the “¶” button. We can also deactivate this option by pressing the ” CTRL + SHIFT + 8″ keys.
In this way, the document will return to normal and we will have been able to completely eliminate. The blanks sheets that appeared in the middle of the Word document.
Also Read: Microsoft Office 2010 Free Download For Windows XP, 7, 8


