When you’ve been running Office for a while, you start to find mail merge excel between different applications, which can save your lot of time.
One of them is to link an Excel database to a Word document. It is very useful, for example, if you have to send a letter to 50 people where the only thing that changes is the recipient’s name. Instead of manually changing the name on the letter before printing it, you can associate the document with an Excel database or table that contains all 50 names, and Word will do it automatically.
In this Word tutorial, we explain:
How to Mail Merge Excel
In a Word document we have written the letter that we are going to send, where the only thing that will change is the recipient’s name:
At the same time in Excel, we have created a list with all the names to which the letter is addressed:

We have to save the Excel document in a file.
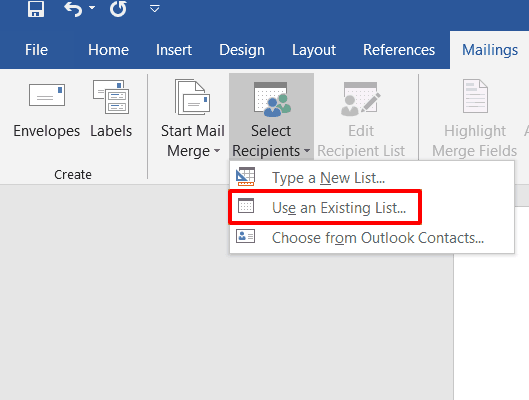
To combine both projects, we are going to use what Office calls Mail Merge. Back to Word, click on the tab Correspondence and choose the icon Start Mail Merge. In the menu that appears, we select Step by Step :

A wizard will open on the right side of the screen:
It consists of six steps. The order of steps to use is Letters, Use the current document, and Use an existing list, clicking Next in each step. We are in Step 3, and now we click on Browse, to select the Excel file that contains the list of names. If the first row has a header, as is our example ( Recipients ), then we must leave this option checked in the file selection.
A screen with the list of names will open. We must mark all that we are going to use:
In the Wizard, click on Next to proceed to the next step.
Now we must tell Word wherein our text the names of the list will be inserted. We select the name that we have written in the starting text (in our example, Juan Antonio Pascual), and in the wizard, on the right, click on More Elements. A window will ask us to choose the list that we are going to use. In our case, Recipients. When you click on Insert, the name of the text is replaced by a reference to Recipients :
In the wizard, click on Next, until all the steps don’t get completed. Close the wizard and go to the Correspondence tab. Click the Results Preview icon. You will see the real names on the letter, where the Recipients reference was. If you click on the left and right arrows, you will see all the names:
When you print, Word will make copies of the letter with the different names.
We have learned to link the data from Excel to Word.


